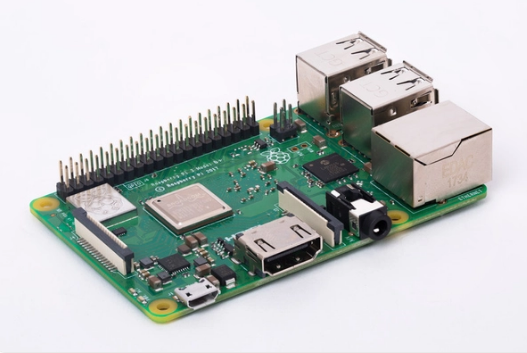
The first thing we need is a Raspberry Pi.
The minimal requirement is a RPi 3B, but a 3B+ is also good and a 4 is actually recommended. Once you will have a working phone, you will want to get a decent interface, and in order to have that you will need a lot of resources. Keep in mind, though, that this comes at a price: a better phone consumes more, so you will need to get a bigger and a heavier battery.
That’s why we’ll use here a RPi 3B+. Here it is:
www.raspberrypi.org/products/raspberry-pi-3-model-b-plus/
First you need to make sure you have a Raspberri Pi OS (Raspbian) fresh install. You can download it here:
www.raspberrypi.org/downloads/raspberry-pi-os
and follow the installation instructions.
The 4G Card
Now, you need a 4G board for Raspberry. You can find here a good one here:
www.waveshare.com/SIM7600E-H-4G-HAT.htm
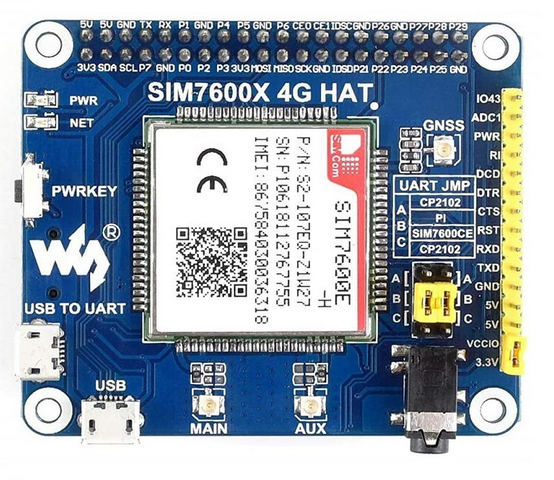
Pay attention to the names and choose the right one for you:
- SIM7600A-H 4G HAT: mainly applicable in North America (US, CA)
- SIM7600E-H 4G HAT, SIM7600E LTE Cat-1 HAT: mainly applicable in Europe, Southeast Asia, West Asia, Africa, China, South Korea
- SIM7600CE 4G HAT: mainly applicable in China
- SIM7600G-H 4G HAT: the global version
Prior to installing it, you need to move the jumper down one step, from the position B to C. This is how the jumper is positioned on the board when you receive it:
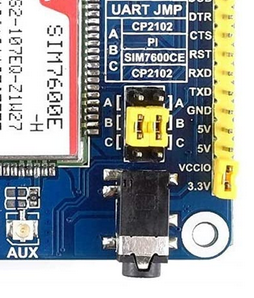
Move it down one step. Then you have to insert you SIM card in its slot on the back of the card, on the upper right corner.
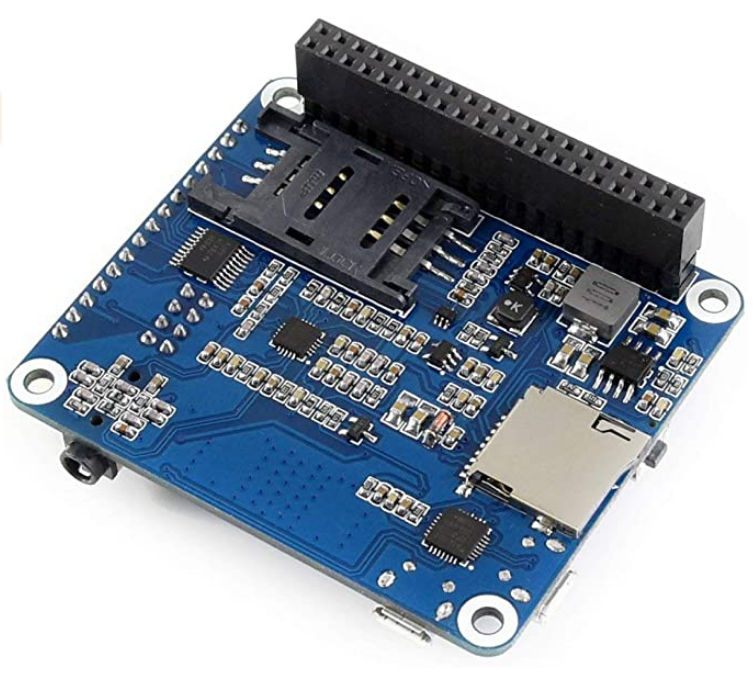
You may also want to add a SD memory card in order to store SMSs (otherwise they will be stored in the limited amount of memory provided by the SIM card).
Next, you can put together the board and the raspberry, through the 40 pins HAT interface (the black solid parallelepiped).
In order to use it, you will also need to connect the board via USB to the Raspberry. Warning: don’t plug the “USB TO UART” input but the “USB” one.
You don’t need to install drivers. In the software section, you will find the code needed to connect the card to the internet and the python interface to make phone calls.
The Touchscreen
Next, you need a display. We chose the 5.5inch Capacitive Touch Screen AMOLED (with protection case), a 1080×1920 display with HDMI Interface and 170° Viewing Angle.
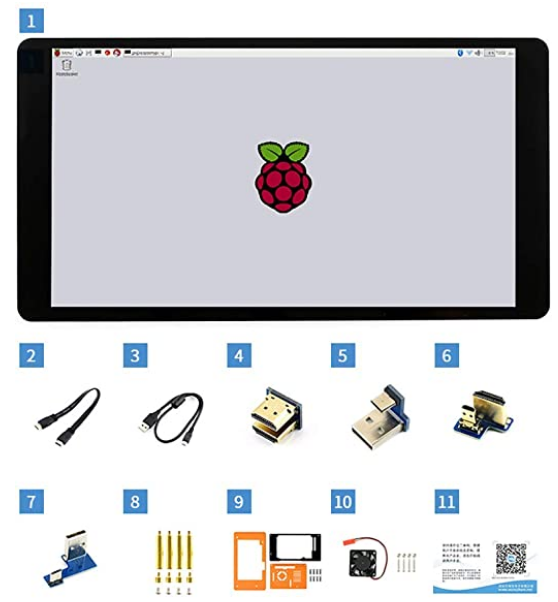
www.waveshare.com/5.5inch-hdmi-amoled-with-case.htm
This display has various pros. It has an excellent resolution, a wide viewing angle, a good touch response and it has a perfect size for a smartphone. Moreover, it is shipped with excellent connectors, that allow to connect the Raspberry to the screen without cables. Also, it is shipped even with a protection case, which is quite an important thing when it comes to build a phone from scratch (this case will add further protection to our yattacase, that you can find here).
If you want something less expensive, you can opt for a 5 inch HDMI Capacitive Touch Screen Monitor (800×480 HD LCD) Display:
www.amazon.co.uk/Raspberry-Screen-Capacitive-Touch-Monitor/dp/B07YCBWRQP
It is smaller but it works. The problem is that you will need to design and print with a 3d printer a specific case, as the one designed here will not work.
On the contrary you should avoid the purchase of displays that work on the HAT connector, like this one: shop.pimoroni.com/products/hyperpixel-4?variant=12569485443155
They work perfectly but they are incompatible with the 4G card.
The audio card (with issue)
Next, you need to install an audio card, in order to let the phone ring when it receives a call. Currently I installed the Audio DAC HAT Sound Card, that you can find here:
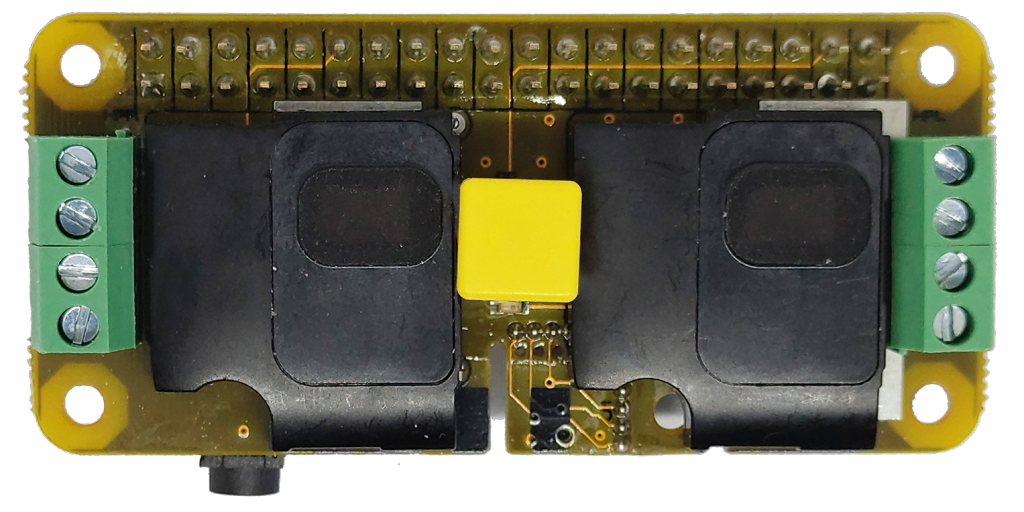
It has built-in speakers and microphone.
Note: this card is for the software audio. The audio of the phone calls gets through the input/output audio jack you can find on the edge of the 4G card. You will need to plug an earphone to hear that.
The installation is very straightforward: just connect the board though the HAT interface and follow these instructions to install the drivers:
forum.raspiaudio.com/t/mic-installation-guide/17
At first it works fine. But there’s an issue: the HAT again. Once you actually let the card play an audio, you lose control over the 4G card. As of now, this is an unresolved problem. I am quite confident that there is a solution. Otherwise, we will need to find a different solution for audio.
The Battery
Now that you have a device able to make and receive calls, connect to the internet over the 4G net, that has a beautiful display and that can ring, you need to power it. How? With a Power Bank.
Here you can find my favourite solution:
www.amazon.it/gp/product/B07VSPTG53/
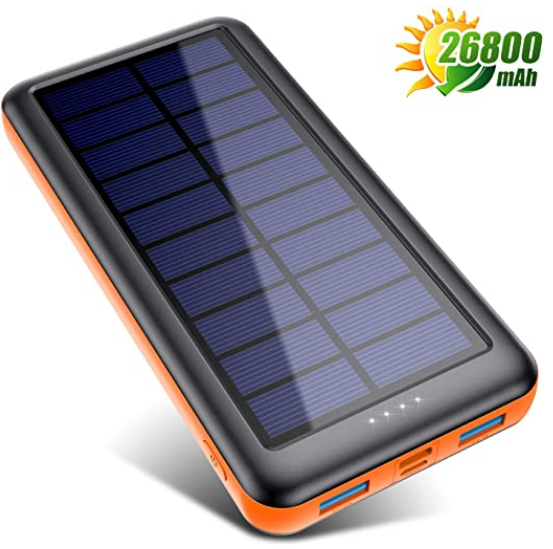
It has a 26,800 mAh capacity (more that enough to let the Yattaphone work for an entire day), with 2 inputs and 2 outputs. Moreover, it has a solar cell on one side. Of course, you cannot really rely on that to power the phone, but it helps. And if you get lost in the forest, you just need to wait a few hours to collect enough power to make the one phone call that will save your life.
A less powerful but much smaller and lighter solution is this one:
go.travel/fr/electriques/power-bank-2500

It is very nice and it has exactly the same size of a Rasperry. But beware: if you go for this one, which has a capacity of 2,500 mA, forget the big display. You will need something much less power-consuming.
Now that everything is set up, it’s time to pass to the software section. Follow me.